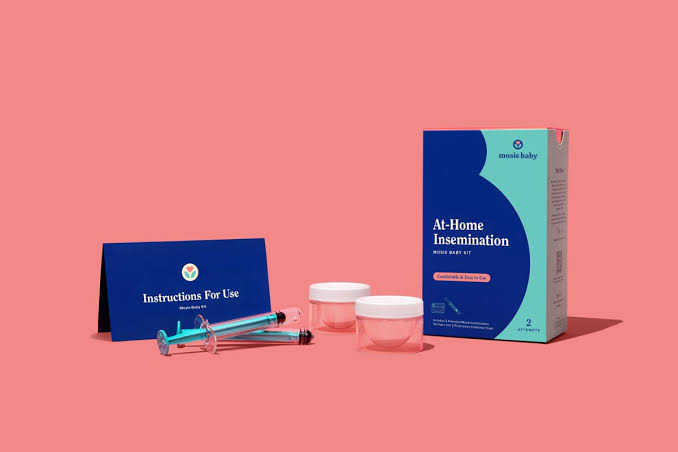
Using an at-home insemination kit can give some people a private and flexible way to try conceiving. The process may be considered by couples using a fresh sperm sample, people working with a known donor, or individuals using frozen donor sperm. Although the basic steps are straightforward, preparation and timing are important. A calm environment, clean equipment, and a clear understanding of the process can make the experience more comfortable.
At-home insemination is generally an intracervical insemination, or ICI, method. Sperm is placed inside the vagina near the cervix, where it must continue through the reproductive tract on its own. This differs from intrauterine insemination, or IUI, which is performed by a fertility professional and places prepared sperm directly into the uterus. For people seeking a practical introduction to the process, MakeAmom provides a step-by-step guide to using an at-home insemination kit.
This article is for general education only. It is not medical advice, and anyone with fertility concerns, pain, irregular cycles, or a known medical condition should consult a qualified healthcare professional.
Understand the Basic Process
At-home insemination usually involves collecting a sperm sample in a clean container and transferring it with a needleless syringe or purpose-built insemination device. The sample is deposited gently into the vaginal canal near the cervix. The goal is to have viable sperm present during the fertile window.
The process does not guarantee pregnancy. Conception depends on ovulation, sperm and egg quality, reproductive health, timing, and chance. More than one cycle may be needed.
Before starting, read the complete instructions supplied with your kit. Different devices may have different shapes, cleaning requirements, insertion instructions, and reuse rules. Do not assume that one product can be used exactly like another.
Gather Your Supplies First
Preparing the supplies before the fertile moment can reduce stress and prevent interruptions. Depending on the type of sample and kit, you may need a needleless syringe or insemination device, a clean collection cup, optional gloves, a towel, a pillow, and a timer.
You should also have your ovulation test results or other cycle-tracking information available. If you are using frozen donor sperm, follow the sperm bank’s instructions and prepare any items required for thawing. Do not use a microwave, boiling water, or an improvised heating method unless a qualified source specifically directs you to do so.
Keep the room private, warm, and comfortable. Lay the equipment on a clean surface where it can be reached easily. If a partner or support person will help, discuss the steps beforehand so everyone understands the plan and feels comfortable.
Confirm the Timing of Ovulation
Timing is one of the most important parts of an insemination attempt. The fertile window includes the days before ovulation and the day of ovulation. Sperm needs to be present while an egg is available for fertilization, so an attempt made too early or too late may be less likely to result in conception.
Ovulation predictor kits can detect a rise in luteinizing hormone, commonly called an LH surge. Many people also track cervical mucus, basal body temperature, cycle dates, or symptoms. Using more than one method may help you understand your individual pattern, particularly when cycles are not perfectly regular.
An LH result does not guarantee that ovulation has occurred. If your cycles are irregular, your test results are confusing, or you have a condition that affects ovulation, ask a healthcare professional for guidance. A fertility app can help organize information, but it should not replace medical advice.
Prepare a Fresh Sperm Sample
If a partner or known donor is providing a fresh sample, it should be collected in a clean container that is suitable for the purpose. Avoid containers with soap residue, chemicals, or other substances that could affect sperm.
Fresh semen may initially be thick and may need a short period to liquefy. Follow the kit instructions or guidance from a healthcare professional, and use the sample within the recommended time.
If a known donor is involved, consider medical screening, infection testing, legal requirements, and documentation. Informal donor arrangements can have legal and health implications that are not always obvious. Professional advice may be useful before beginning the process.
Handle Frozen Donor Sperm Carefully
Frozen donor sperm must be thawed according to the instructions from the sperm bank or fertility provider. The correct timing and temperature can depend on the sample type and cryoprotectant. Never guess at the thawing procedure or use a method that could damage the sample.
Check the label before opening or transferring a vial. Preserve the documentation and confirm that the sample belongs to the intended recipient. Once thawed, the sample should be used within the timeframe provided by the sperm bank.
Frozen samples may be small in volume, so careful handling matters. Use the appropriate device and avoid unnecessary transfers. If you are unsure about any step, contact the sperm bank or a healthcare professional before proceeding.
Practice With the Device
If you are using an insemination device for the first time, practicing the movement with water can make the process feel less unfamiliar. This allows you to understand how the plunger works, how to hold the device, and how much pressure is needed.
Practice should never involve inserting an unclean or unsuitable object into the body. Use only the device according to its instructions. If the kit is reusable, confirm how it must be cleaned and stored before practicing or using it.
Familiarity can help reduce nervousness. You should know where the device is held, how far it is intended to be inserted, and how slowly the sample should be deposited. Do not force the device or continue if insertion causes significant pain.
Create a Comfortable Position
When you are ready to begin, choose a private position that allows you to relax. Many people lie on their back with a pillow under their hips, but comfort is more important than following a rigid posture. You should be able to maintain the position without straining.
Place all supplies within reach before preparing the sample. Wash your hands thoroughly, and use gloves if they help with hygiene or comfort. If a partner is assisting, they should also wash their hands and follow the kit’s instructions.
Relaxing the pelvic muscles may make insertion easier. Take slow breaths and do not rush. If you feel pain, stop and reassess. At-home insemination should not be forced or treated as a test of endurance.
Transfer and Deposit the Sample Gently
Transfer the prepared sample into the needleless syringe or insemination device as instructed. Avoid unnecessary air bubbles and handle the sample gently. Position the device at the entrance of the vaginal canal and insert it slowly toward the back, without forcing it.
The device generally does not need to be inserted deeply. Follow the product’s instructions for placement and do not attempt to reach the uterus. The purpose of ICI is to deposit sperm in the vagina near the cervix, not to pass through the cervix.
Depress the plunger slowly and steadily. Sudden pressure may be uncomfortable and can cause the sample to leak back out. Once the sample has been deposited, remove the device carefully. Minor leakage afterward is common and does not necessarily mean that the attempt has failed.
Do not reuse a single-use device. If your product is reusable, clean it exactly as directed. Never share an insemination device with another person.
Rest Afterward Without Pressure
After insemination, you may choose to lie down with your hips slightly elevated for about 15 to 30 minutes. This can provide a quiet period to relax, but remaining completely still for hours is not necessary. Normal movement afterward does not automatically prevent conception.
Use the time to breathe, listen to music, or rest with your partner. Try not to judge the result based on leakage, sensations, or the absence of symptoms. The body’s reproductive processes cannot be measured immediately after insemination.
There is no guaranteed position, supplement, or routine that can ensure pregnancy. Be cautious about claims that promise a specific result from a single technique or product.
Avoid Common Mistakes
Standard lubricants may interfere with sperm movement, so do not use one unless it is specifically labeled as fertility-friendly or approved by a healthcare professional. If insertion is uncomfortable, ask about safer alternatives rather than using a household product.
Do not rush the collection or thawing process. Do not use unclean containers, sharp objects, or equipment that is damaged. Do not exceed the device’s intended use or ignore instructions about cleaning and storage.
It is also important not to treat a home kit as a solution for every fertility challenge. Problems involving ovulation, sperm quality, blocked tubes, pelvic pain, or reproductive anatomy may require professional evaluation. Buying additional equipment without understanding the underlying issue may delay useful care.
Track the Cycle and the Attempt
Keep a simple record of the first day of your period, ovulation test results, cervical mucus observations, insemination date and time, sample type, and any unusual symptoms. This can help you understand your cycle and provide useful information if you consult a healthcare provider.
Tracking helps you review whether attempts are occurring during the likely fertile window. If conception does not occur after repeated, well-timed attempts, consider asking for medical guidance. The appropriate timing depends on age, medical history, and known risk factors.
Take Care During the Waiting Period
The time between insemination and a pregnancy test can feel long. Continue normal healthy routines, take prenatal vitamins if recommended, stay hydrated, and follow any instructions provided by your healthcare professional. Avoid alcohol and discuss medications or supplements with a provider if pregnancy is possible.
A home pregnancy test may detect pregnancy several days before or around the expected period, but testing too early can produce a false-negative result. Follow the instructions and wait until the appropriate time.
Seek prompt medical care for severe abdominal pain, heavy bleeding, fainting, fever, or other concerning symptoms. Do not assume that every symptom is part of normal conception or early pregnancy.
Choosing a Suitable Kit
When comparing products, consider the material, design, comfort, cleaning process, reusability, sample type, and total cost over several cycles. A person using frozen donor sperm may have different needs from someone using a fresh sample. Someone with pelvic sensitivity may prioritize a soft, gentle design.
Read the product description and instructions before buying. Confirm whether the kit is single-use or reusable, whether it includes a collection cup, and how the components should be cleaned. If a manufacturer provides different designs for different situations, review the intended use rather than choosing only by price.
A purpose-built device may make the process feel more organized, but it cannot guarantee a pregnancy. The best option is one that is appropriate for your situation, used hygienically, and handled according to the instructions.
Final Thoughts
Using an at-home insemination kit is a personal decision that benefits from preparation and realistic expectations. Track ovulation, gather supplies, handle fresh or frozen samples carefully, use clean equipment, insert the device gently, and rest afterward without putting pressure on yourself.
For a detailed step-by-step resource, How to Use an At-Home Insemination Kit explains preparation, sample handling, positioning, insertion, and aftercare. Review the manufacturer’s instructions and consult a qualified healthcare professional before beginning fertility treatment or if you have medical concerns.
People trying to conceive deserve clear information and compassionate support. At-home insemination may be one option, but it is not the right approach for everyone. By understanding ICI, planning around ovulation, prioritizing hygiene, and seeking advice when needed, you can make more informed decisions throughout your conception journey. Additional information is available at makeamom.com.
This article is for general educational purposes only. It is not medical advice and does not diagnose, treat, or prevent any condition. Individual results vary. Consult a qualified healthcare professional for guidance specific to your circumstances.